Beading Clasp Threading

The first thing you will want to do when stringing your necklace or bracelet is select the appropriate size and length of thread for your beads. I prefer to use griffin beading silk that comes on a card with a needle attached. It comes in a variety of sizes and colors so it is easy to find one that will match nearly any type of gemstone bead or pearl. The best way to determine what size is appropriate is to test the beads by stringing one on the silk. I have found that size 4 usually fits most pearls. Most precious stones are drilled very small because they are sold by carat weight so they will often fit on a size 1 or 2 thread. If you are not going to use griffin beading silk with an attached needle, you will need to determine how much thread or silk you need. My rule of thumb for knotting is to set out double the length of the necklace or bracelet. So if you want to make a 7-inch bracelet, you’ll want to allow 14 inches of silk or thread. If you are a first time knotter, I would recommend knotting for a while without worrying about putting a clasp on, just so you can get the hang of it. You can then cut the practice strand apart when you are happy with how your knots look. Even if you are an experienced knotter, I recommend doing a few practice knots to make sure that you are happy with the size of the knots on the thread you have chosen. Once you have found the right size thread you are ready for the next step: attaching the clasp. There are several ways of attaching clasps. I prefer to use French wire over bead tips because it is more secure and has a more finished look. First you tie a slip knot at the end of the thread and string your bead onto the silk. Then you string on about ¼ to ½ inch of appropriately sized French wire. You want the wire to be large enough that it does not slide into the hole of the bead but small enough that the clasp will fit onto it. If you are stringing beads with very large holes and large thread you may not be able to find French wire that will fit onto the thread. In that case, since the thread is so large I simply use the thread to attach the clasp. In any case once you have strung on the bead, the French wire and the clasp, you string the needle back through the hole in the bead that it just came through so that the French wire forms a loop with the clasp on it. This will leave you with a clasp on one side of your bead and a slip knot and your needle with thread on the other side. After you have attached the clasp and strung the needle and thread back through you are ready for the next step: stringing and knotting. Many people use tools to help them knot between the beads when they are making a necklace or bracelet. The only tool that I ever use when knotting is an awl. I usually knot using the next bead in line to make the knot tight. You can either string all of the beads/pearls onto the thread/silk or you can string just a few on at a time. I then take the end that has the clasp on it in my left hand and tie a knot keeping the loop fairly large until it is close to the bead with the clasp on the end of it. As you get the knot/loop closer to the bead you make it smaller and smaller until you are right against the bead and then you bring it tight against the bead. Then you slide the following bead down onto the knot to make it extra tight. Then you do the same for all the rest of the beads. You may run into a few problems in your knotting process. If you pull the knot too tight while it is too far away from the bead you will want to use an awl to loosen the knot and bring it closer to the bead. You must be careful not to tie any knot too tight when it is too far from the bead because you will not be able to fix it. If the knot is too far away and you are unable to loosen it to move it you may try tying another knot to make it closer. It will be slightly larger than the other knots but it will salvage your necklace or bracelet. Be sure not to knot the between the final two beads because you are going to need that space for when you attach the clasp. When you have knotted between all of the beads except the last two you are ready for the final step: finishing the necklace or bracelet. When you have strung and knotted all of your beads or pearls leaving one space unknotted at the end you simply go through the same process that you went through initially to attach the other end of the clasp. String on an appropriately sized piece of French wire and the other end of the clasp and string the thread back through. Then you want to divide the thread and tie a secure jeweler’s knot between the first two beads on each end. A jeweler’s knot is when you tie just like you’re tying the first step in a shoelace (not the bow part) but instead of looping through once you loop through twice. If you tie two jeweler’s knots on each end your necklace or bracelet will be both balanced and secure. I then use watch crystal cement to glue these knots and make it extra secure. Then leave the glue to dry...
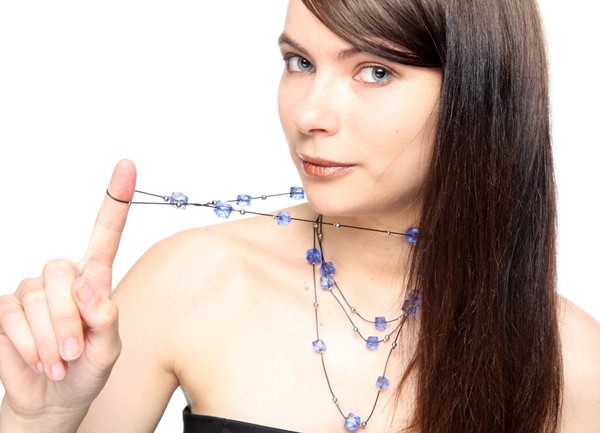
Making beaded jewelry is an inexpensive and fun hobby that nearly anyone can do. The materials needed are readily accessible and cost very little money. Aside from the requisite thread, needle and the beads, there are also some other materials that the hobbyist can use in making beaded jewelry. Hobbyists can also experiment with various beading techniques to make interesting and unique creations. There are several techniques involved in making beaded jewelry. Stringing is one, and wire-working with beads is another. Various types of string are available: cords, plastic, twine. Additionally, silk and nylon threads can also be utilized in making beaded jewelry. Using hemp fiber in beaded jewelry making is a nice touch – it makes for an unusual product and would also be a great topic for conversation. Wire of various thicknesses is another popular option. Additionally, wire is used to make beaded jewelry items such as necklaces, hairpins and earrings, and to attach clasps. Beads for jewelry come in all shapes and forms as well. In spite of beaded jewelry’s reputation for being inexpensive, a person can also use precious gemstones like pearls and precious metals, such as gold and silver, to make beaded dress accessories. For beginners, however, less costly materials are widely available for making beaded jewelry: glass, crystal, coral, to name a few. Whatever materials the artist uses, he or she is easily able to customize the type of beaded jewelry to be worn personally, given as a gift, or sold to beaded jewelry enthusiasts. To enhance the overall visual effect of the beads, a number of knotting and stitching techniques are recommended. There are simple knots and stitches for beginners, and with practice, they will be able to progress to the more complicated and fancier methods used in making beaded jewelry. It’s interesting to note that knots have mystical connotations in some cultures. For some East Indians, knots can be used to curse a person. In Gypsy lore, it is important to untie knots in the clothing of a woman in childbirth. And the expression ‘tying the knot’ derives from the ancient Romans, when the groom would untie the knots of his bride’s girdle before consummating the marriage. In which case, it should be ‘untying the knot.’ In the ancient past, beaded jewelry was used to denote wealth and social status – only the highest class of society was allowed to wear them. Thankfully, this is not so today and beaded jewelry can be enjoyed by people from all walks of life. Making beaded jewelry is an activity that requires no special training and technical skills. Creativity, fun and dedication are the only prerequisites in making these highly fashionable...


